Tuesday, January 24, 2012

A little cover for my Parasol...

I made a parasol cover as I am taking it with me to Bali and as it is made of paper I thought it needed a bit of protection – plus while I am out and about it will be a place to store and carry it when it is not needed.


I used a canvas bag that you get from every clothing store nowdays, cut the sides to open it up and cut the straps off (to be used for the shoulder strap).


Work out how wide it needs to be by inserting the parasol and pinning the sides – you can cut it as a cone shape or leave as a rectangle, I had it as a rectangle.

Next sew the straps on by sewing one at either end of the cover, right side of the fabric (making allowances for side seems, bottom gathers and top fold over) – to make it strong I sewed using a triple stitch so the strap is extra tough.

 
Next put you fabric inside out and create the gather at the bottom by sewing a long stitch then pulling the bobbin thread to gather then sewing a triple stitch along the bottom to set the gather. Also overlock or zipzag the side and sew a seam.

Create the drawstring at the top by folding over the top and sewing the bottom edge – I also folded the openings back so that no zigzag edges were showing. The cord I used was already ‘closed’ so I inserted it in the fold before I sewed the edge.


Monday, January 23, 2012

Gong Hei Fat Choi!

Happy Chinese New Year everyone. When to the Husband's grandparents house yesterday for lunch and offerings and again this morning for a vegetarian breakfast. The photos are of the offerings and the breakfast. We also give out red packets containing money to unmarried people (miss out there!) and gifts of oranges and lollies.
Published with Blogger-droid v1.6.7

Thursday, January 19, 2012

Boxes, boxes everywhere...

I am a huge fan of Zip Lock bags - everything I get a hold of ends up in one! So as I was rearranging my daughters room for the hundredth time (small room - lots of stuff) I was annoyed by all the puzzle boxes that were stacked up on top of each other. Considering how little space the puzzle pieces actually take up in the box I knew a Zip Lock bag makeover was in order.

To help identify the actually puzzle in the bag I cut out the picture from the box and put it in the bag. The boxes I had where small enough to have most of the picture cut out but if your box pictures are large you could probably scan and shrink the picture down or print it off the same size onto paper and fold it up. I plan on putting them all in a shoe box or similar to be known as the "Puzzle Box".

Wednesday, January 11, 2012

1920's Quick Costume


This Saturday is a 1920's themed club party which I thought would cool to go to - as I have 5 days to get something together this costume will be one of my quick costumes that only requires things from the wardrobe or one item of sewing to create the look. As it is a 20's Pimps and Hoe's theme I want to go as a an ironic 'pure' hoe dressed in light pastel colours of pinks and whites with the signature vampy Betty Boop style dark red 'Clara Bow' lips, doe eyes and dark nails.

One idea would be for a hanky hem style skirt (not exactly that style in the 20's but it has a similar look and is much easier to achieve - see diagram using two square fabrics layered in the same style as a circle skirt (the hole is cut out and elastic threaded around the outside)) with a long hem singlet/tank so it creates the illusion of a drop waist dress. You could also sew a sequin band around the bottom of the singlet/tank as the 'belt' and use it also to create a matching headband with a feather.

I also love the white fox fur wrap/shawl she has around her neck so I thought about getting a strip of white faux fur and white fabric to line the bottom so it doesn't itch and is cooler for dancing and to also create a head and ears by cutting a pattern and stuffing it. to make it fun I will need some eyes so I'm sure they will have them at Spotlight. Now I don't think I can get my hands on one of those hats I think the head band with the feather at the front (a bit different then the usual large feather at the back) would work well.


Tuesday, January 10, 2012

Ring in the new year!

Nothing like a get together with friends to ring in the new year!

This may have been the first year that we have had a house party as we normally venture out into 'town' to get elbowed in the face and punched in the mouth (yes that has happened - but for me only realised a few days later while putting on makeup...) - anyway this year we would stay away from the drunken hooligans and have a sophisticated evening...it starts that way until the alcohol starts a flowing, but then again your with friend so all you do is rat on each other and tell them to shut up. 

I did the classical Silver and Black theme since I started preparing the decoration a few days before the party. I didn't want them to cost a lot, so I printed the 'Happy New Year' on paper at work (as you can see I don't do a lot here at work :p) getting the black pattern of the Internet and threading it together with black ribbon. For the hanging decorations I brought white dollies (would have got silver if I could find any) had the sequin fabric left over from a Red Sonia costume I made and had stars and cups under the sequin fabric left over from my 26th Birthday - I just threaded the fishing/craft nylon string through the fabric (cut in squares) and attached it to the cup then sticky taped the stars and dollies to the thread. I also made black felt moustaches attached to skewer sticks for photos but we never took any cause we were too busy holding them to our faces :D

Tuesday, December 20, 2011

DIY Time! Glass Christmas Tree Baubles

Last year when the Christmas sales were on and all the decorations and Christmas stock was on sale (best time to buy the really fancy wrapping paper and cards) I brought a few packets of plain glass baubles - they have a hole in the top so you can feed decorations inside. I wanted some more silver ornaments so I cut up some sliver glitter fern and just feed it through. Quite effective with the lights hitting them.

You could also feed through photos of your family or pets or even do them up in different themes to give away as presents.


Tuesday, December 06, 2011

Christmas decorations are up, up and...smash!

I put up the Christmas decorations yesterday and decided to put half the tree up..."half a tree?" I hear you say...

One year I saw a Christmas tree in the shops...to save space (or because they were lazy) they didn't put the branches of one side on and had it flush up against the wall - When I first saw it I thought that was the design but further investigation proved otherwise. I think it is a great option if you are short on space or like me never decorate the back side of the tree (as no one sees it). So I tried it this year...it does look a bit funny from the side (hubby before I told him: "Looks a bit flat against the wall...") but it looks quite normal from the front.

Did have one tragedy...didn't even realise it was glass till it fell in slow motion and a little "yeep!" came from my lips.

Oh ah...Shepherds Pie

Oh it was hubby's first day back at work yesterday after 6 weeks off after an ACL injury/operation so I wanted something tasty for dinner without much fuss...and really without much ingredients! So I looked in the freezer and found mince, I do need a book like "101 Ways with Mince" (which I think is actually a book...) because I always have it probably because it's so cheap and it makes a bit of food.

The cooking method is just like making bolognese sauce and mash potato so I won't go into that but once the mince is cooked and the potato is mashed, place the mince in a oven proof dish (approx 7cm deep and 18cm square) and spoon the mash on the top followed by the melted butter and cheese. Place in a 200C preheated oven for about 25min or until cheese is slightly browned (my Family was hungry so I didn't leave it in there as long).


Friday, December 02, 2011

Red Sonya - 80's Party

Published with Blogger-droid v1.6.7

Mum's "21st" (61st) Birthday Dinner

Last night was Mum's birthday dinner so we had a little 'formal' dining experience without the hassle of driving to a resturant in town (mum lives about 40min from town so it's too far at night). We set up the table and order food from our local Golf Club that's just down the road (it has great food but as it's a family resturant it can be a bit noisy when it's busy - which is every night!).
 
The table cloth was brought from Cairns, Queensland on our girly holiday earlier in the year - should probably do a post on that...


Published with Blogger-droid v1.6.7

Tuesday, November 29, 2011

Oh, It be that time of year again...

Just wrapped my first presents - for Husband. I wanted to go for a traditional theme. I did think of using newspaper, but if I did I wanted to use international newspapers and since I didn't know where to go to get that I thought of the classic brown paper. I love the though of old parcels wrapped in brown paper and tied with twine and when I found this Christmas wrapping paper in Spotlight (large sewing, craft and party supply store) I knew it was the one, the rolls are 5m long and even though I will not get through it I will go back and get another design to mix it up a bit. I also got myself some green and red raffia and swing tags to keep that old fashioned theme.

Shade and Play!

Unfortunately (or fortunately) not all of Maddison's things can fit inside the house - such as her cubby house (although when we first got it, it was set up in her room...but now with congregation of princess memorabilia it has been relegated outside)...but with the incredible humidity we have here up in the tropics and during the 'wet' season it is murder to wonder to your ensuit from your airconed bedroom...let alone sitting on your veranda!

Even on the veranda the plastic cubby was like sitting in a hot box, so we removed the roof - dah, but then it really isn't a cubby...it needs a roof! So I though about shade cloth, lets the air in and keeps it dark to give the illusion of a cosy cottage. I also added some on the window to keep the setting sun from blasting inside. On another note I will be purchasing an outdoor setting cover the right size to fit over the cubby for the next wet season when the rain comes in from the veranda side (it alternates each year).


It would depend on the type of cubby but I cut holes to fit the existing closers used for the plastic roof (green nobs) and I also used two rods (already the correct size) and fit them in pre-existing grooves to hold up the pitch.

Monday, November 28, 2011

Num num - Bento time!

A few lunches I made for my 3 year old using the Japanese concept of visually appealling food.


.
Published with Blogger-droid v1.6.7

Baby Shower - Nappy Cake

Went to a baby shower on the weekend and decided to try my hand at a nappy cake. Basically you use 50 or more disposal nappies and roll them so they create the layers of a cake.

For the first layer I rolled up 5 nappies then secured them with a rubber band, I then overlapped nappies horizontal around until I got the size circle I wanted, secured it with string then wrapped the layer in tissue paper (or muslin wrap as a extra gift) once all the layers are done you can put a small woddern dow in the middle to keep it together. Add decorations like ribbons and toys (you can add small things like dummies and bath items too). Put it all on a cake plate and your done!


Published with Blogger-droid v1.6.7

Thursday, November 24, 2011

Bento!

Oh I have discovered a love for bento boxes (Japanese lunch box) – While I was looking up hello kitty cutlery sets I stumbled upon them and I though it would be good for Maddison to make her food more appealing (also when she starts school). Below are some of the tools they have to produce the shapes (Hello Kitty specifically). But you can use cookie cutters and other things – I brought some silicone cupcake patties, some plain pink and some green with bee features (good buy I thought from the cheap store) so I can fill them with whatever – Japanese use disposable ones I think. I do need to get a shallow lunch box so that what is in the box doesn’t float around and the lid just sits on the cupcake top. You can use deli meat and sandwiches/bread cooked veggies and of course rice :p


Thursday, November 10, 2011

Christmas is Coming!!!

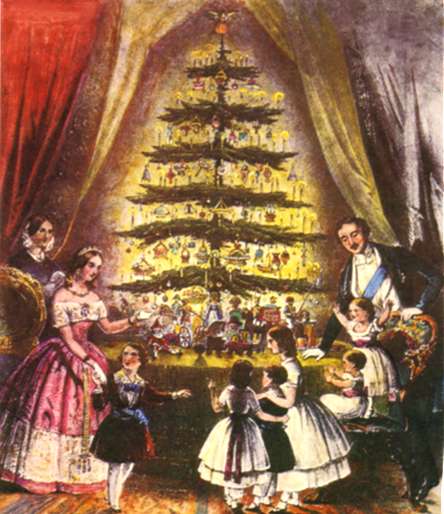
Oh yes I know, the dreaded carols playing in the shopping centres, decorations and trees being sold in the stores (they appeared at the start of October) - so while I wait for my friend to post photos of our Halloween night out I thought I would start to think about my Christmas sewing adventures...I have always wanted a Santa Suit that didn't look like a cheap $2 store one that some alcoholic party goer will be wearing...I have always loved the traditional Christmas cards from the Victorian time when the Christmas as we know it came into existence by Prince Albert based on the German traditions. Now these premade suits normally cost close to $400...not sure why cause certainly they aren't that hard to make (famous last words...)? and only consist of red velvet (cheaper velveteen) and white fur...

Plus I also want to make my daughter a 'Christmas Dress' something that evokes the traditional elements of Christmas...tartan, velvet, gold trim...


Friday, October 28, 2011

French Court Shoes

I am currently thinking of my feet...and what I will be putting on them for my costume. I was inspired by this post - although I am looking at more of the pointed toe and kitten heel style shoe, here is a little sketch: 
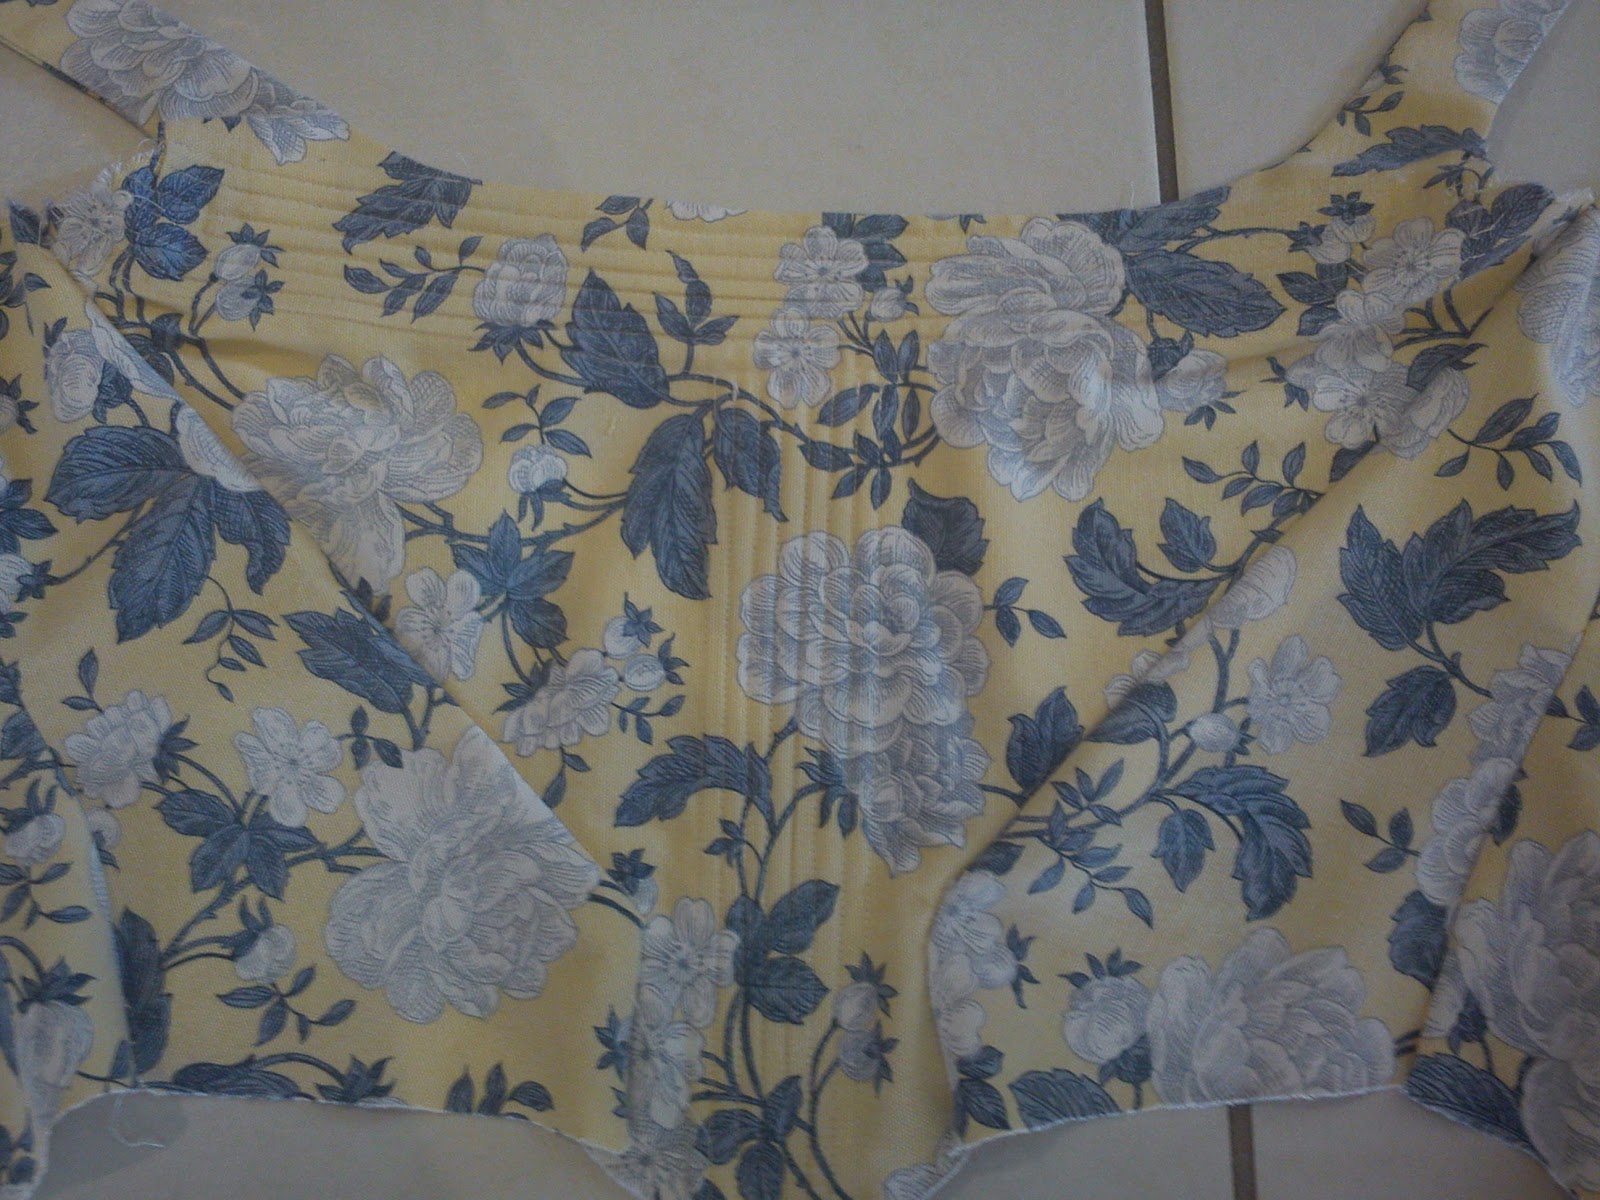
I want to use some of the yellow and blue flowered fabric in the front and have it standing up (I'll use fabric stiffner) then use the blue ribbon - that I used for the bows on the dress - for the bows on the front and back of the heel and around the edges. I will probably put a cream rose on the front - same used for my chocker which I haven't talked about yet...next post hopefully.


Here are the shoes I ended up with - I brought the gold ballet flats and hot glue guned the bows and accents on (which didn't fair well the next morning).

Tuesday, October 25, 2011

French Aristrocrat's Bag


I needed a bag for when I go out so I made one, just a little draw string one.

Published with Blogger-droid v1.6.7

French Aristocrat


Here a few pics of a super fast trial run of the hair - I will curl those side bits and the little piece I will leave out at the back (you can just see the little bow at the back) that is also a large butterfly clip in my hair. I dusted my hair with Tailcum powder and sprayed with hairspray, also I used pillow stuffing in the pouf. Fortunatly my hair does what it is told so this look only took like 10 min, so with a few more minutes addention it should look good!

...had a little mishap with the purchased wig off Ebay...I'm not sure where they expected me to put my own hair under the wig but there is no space and it doesn’t even sit on your head or rather stay there with movement – I was dubious as they only had a manufactures pic – I do prefer to see a true pic of costumes and that. Oh well…

I don’t look like Marie Antoinette obviously but I still look like a French Aristocrat so I can still be a ‘ghost’ from that time with me blood and all...I was going to use some blood across my neck (head chopped off) and I also got some white body makeup stuff so I can make myself nice and white (I will possibly mix my foundation and the white stuff depending…) I should give the white makeup a test run too if only on a small patch. Just add a beauty mark or little black shape as was popular :p


Published with Blogger-droid v1.6.7

Sunday, October 23, 2011

Hocus Pocus - Toil and Trouble!


My first (of many I hope) Halloween costume for my daughter. Halloween isnt a big event here in Australia so I try to make the most of it for obvious reasons :p She wanted to be a witch as Minnie Mouse is one in the Mickey Mouse Clubhouse Halloween episode. I just used a black tshirt she already had and made a skirt with a roll filled with stuffing around the waist to make the skirt stand out more.

Published with Blogger-droid v1.6.7

Saturday, October 22, 2011

Marie Antoinette 80% Complete


Just finished the zip and sewed the lace around the neckline. Quite happy with the results :)

Published with Blogger-droid v1.6.7

Thursday, October 20, 2011

Marie Antoinette Dress


A slightly better less fuzzy pic of my dress - including the neckline lace. I really need to get my hands on a zip as I am at a stand point!

Published with Blogger-droid v1.6.7

Intergalactic Police Federation


Images of my space costume for a 25th birthday. First time I used spray paint and boy was it fun! It made everything and anything look awesome :p The Guns were just $5 water guns spray painted black with gold detail, the communication headset was just a cheap computer headset and I removed the one side and applied my magic paint :)

Here is all of use dressed at the party - my hubby is behind me all so decked out...he didn't know what hit him :p

We also had photo IDs, guns and holsters...have to take some more pics of them.

Wednesday, October 19, 2011

Marie Antoinette

This costume is in preperation for the 2011 Halloween season (not that I will wear it to too many places :p). Thsi is the first full outfit I have made since high school - about 7 yrs ago (had to use the calculator for that one :p) so I am a little proud of myself...and a bit surprised how easily it came together consiering I whanted a corset bodice and only used a template and no instructions...


This is the bodice of the dress - I was going make a corset then make a bodice dress to go over it but that was too much for a first go I thought - I used zip cable ties for the 'boning'.

Here is where I got the corset pattern - has a few useful other patterns as well.


Sorry that the photo is blurry but you get the idea (I'll get a better pic later) - I haven't finished the back as yet, of which I will put a zip and hid it with a fabric tab. You will notice that the neck is too wide for mid 1700's as its in the corset style but I will add some lace and that for modest!


Here is a step towards my hip pads (they are made from a cushions insert I had lying around and I just cut it in half) - they are a little too puffy for the skirt so I will need to take some stuffing out and they will need to be on there own belt as the petticoat elastic isn't strong enough and they will end up around my ankles :D

So it is coming together I think...more updates to come!


Related Posts Plugin for WordPress, Blogger...